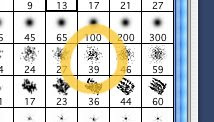
1. Start with this brush. It's one of the standard Photoshop brushes.

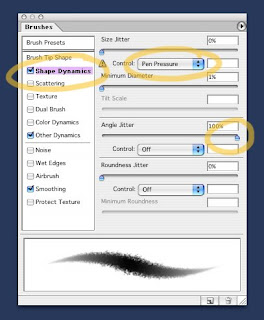
2. In the Shape Dynamics section of the Brushes palette, set the Size Control to Pen Pressure and set the Angle jitter to 100%.

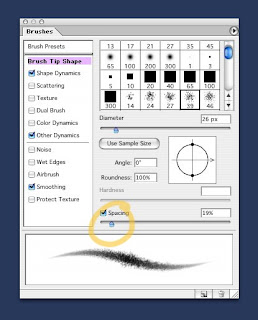
3. Next, in the Brush Tip Shapes section, set the Spacing to something like 20%. Spacing will control what looks like paper-grain.
(Note: as with all brushes, if the spacing is set too low, you run the risk of bogging down the speed performance of the brush...especially with large brushes.)

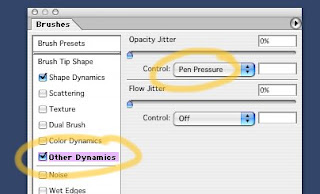
This is the basic brush, but you can always add other dynamics. I'll often add an opacity control to the brush (found in "Other Dynamics"), so I can get the effect of a light touch.

Remember, these dynamics can be adjusted depending upon your needs. For instance, if you don't want your pencil co come to a sharp point at low pressure, turn down the Size Control (from step 1). Or turn it off entirely.
OK, that's pretty much it. Now go draw!
0 Response to "Photoshop "Pencil" Brush"
Post a Comment